1. 安装问题
1.1 解决VSCode安装Go tools失败的问题
May 26, 2020 | 1548 阅读
测试环境
$ go version
go version go1.14.3 darwin/amd64
$ sw_vers
ProductName:	Mac OS X
ProductVersion:	10.14.6
BuildVersion:	18G4032
安装Go后,打开VS Code,按照提示安装了微软官方的GO插件。但在安装go tools时,出现了下面的一大堆错误。
go.toolsGopath setting is not set. Using GOPATH /Users/l2m2/go
Installing 17 tools at /Users/l2m2/go/bin in module mode.
  gocode
  gopkgs
  go-outline
  go-symbols
  guru
  gorename
  gotests
  gomodifytags
  impl
  fillstruct
  goplay
  godoctor
  dlv
  gocode-gomod
  godef
  goimports
  golint

Installing github.com/mdempsky/gocode FAILED
Installing github.com/uudashr/gopkgs/v2/cmd/gopkgs FAILED
Installing github.com/ramya-rao-a/go-outline FAILED
Installing github.com/acroca/go-symbols FAILED
Installing golang.org/x/tools/cmd/guru FAILED
Installing golang.org/x/tools/cmd/gorename FAILED
Installing github.com/cweill/gotests/... FAILED
Installing github.com/fatih/gomodifytags FAILED
Installing github.com/josharian/impl FAILED
Installing github.com/davidrjenni/reftools/cmd/fillstruct FAILED
Installing github.com/haya14busa/goplay/cmd/goplay FAILED
Installing github.com/godoctor/godoctor FAILED
Installing github.com/go-delve/delve/cmd/dlv FAILED
Installing github.com/stamblerre/gocode FAILED
Installing github.com/rogpeppe/godef FAILED
Installing golang.org/x/tools/cmd/goimports FAILED
Installing golang.org/x/lint/golint FAILED

17 tools failed to install.

gocode:
Error: Command failed: /usr/local/go/bin/go get -v github.com/mdempsky/gocode
go get github.com/mdempsky/gocode: module github.com/mdempsky/gocode: Get "https://proxy.golang.org/github.com/mdempsky/gocode/@v/list": dial tcp 172.217.160.113:443: i/o timeout
go get github.com/mdempsky/gocode: module github.com/mdempsky/gocode: Get "https://proxy.golang.org/github.com/mdempsky/gocode/@v/list": dial tcp 172.217.160.113:443: i/o timeout
解决方案
设置代理:
$ go env -w GO111MODULE=on
$ go env -w GOPROXY=https://goproxy.io,direct
设置完成后重启VS Code,按照提示安装即可。
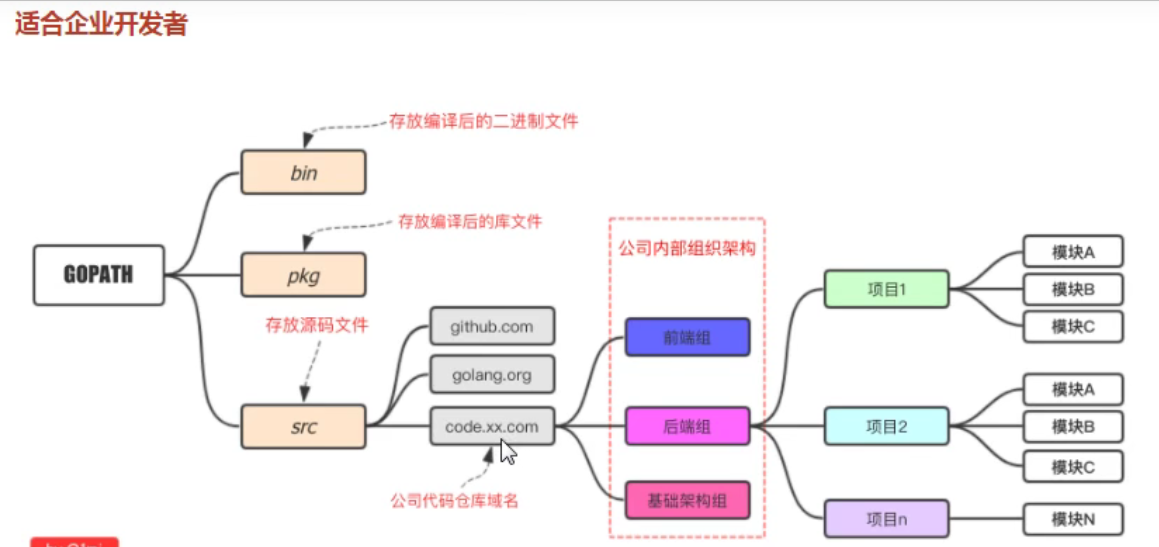
go开发
企业开发结构
编译
go build
go build -o hello.exe
分两步,第一步先编译得到可执行文件。第二步将可执行文件拷贝到`GOPATH/bin`目录。
go install
go run
像执行脚本的方式运行跨平台编译
需要指定目标操作系统的平台和处理器架构即可:
set CGO_ENABLED=0 //禁用go
set GOOS=linux // 目标平台是linux
set GOARCH=amd64 //目标处理器架构是amd64然后再执行go build命令,得到的就是能够在linux平台运行的可执行文件了。
基础语法
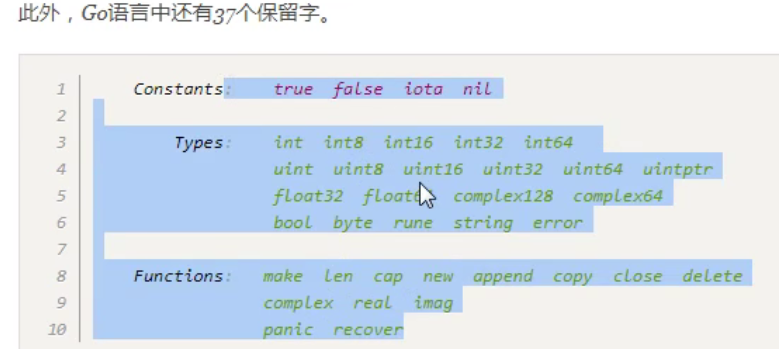
1.关键字

2.变量
函数外只能放置标识符的声明。(变量、常量、函数、类型可以放在函数外面)
var s1 string 声明一个保存字符串类型数据的s1变量
var age int
var isOk bool
// 批量声明
var (
	name string
    age int
    isOk bool
)
ss := "heihei" // 简短变量声明自动格式化:go fmt xxx.go
2.1匿名变量
_ 下划线表示匿名变量。这个用来占位。
3.常量和iota
const pi = 3.14
const e = 2.8声明了pi和e这两个常量之后,在整个程序运行期间它们的值都不能再变化了。
多个变量可以一起声明:
const (
	pi = 3.14
    e = 2.8
)const同时声明多个变量时,如果省略了值表示和上面一行的值相同。🍨例如:
const (
	n1 = 100
    n2
    n3
)
3.1iota
iota是go语言的常量计数器,只能在常量的表达式中使用。
iota在const关键字出现时将被重置为0。const中每新增一行常量声明将使iota计数一次(iota可理解为const语句块中的索引)。
🍨例子:
const (
	n1 = iota //0
    n2 //1
    n3 //2
    n4 //3
)

const (
	c1 = iota //0
    c2 = 100
    c3 = iota // 2 `const`中每新增一行常量声明将使`iota`计数一次
    c4
)

const (
	d1, d2 = iota + 1, iota + 2 // d1 = 1 d2 = 2 iota为0,在同一行
    d3, d4 = iota + 3, iota + 4 // d3 = 4, d4 = 5
)
🍨 典型的例子:
const (
	_ = iota
    KB = 1 << (10 * iota)
    MB = 1 << (10 * iota)
    GB = 1 << (10 * iota)
    TB = 1 << (10 * iota)
    PB = 1 << (10 * iota)
)
4.基本数据类型
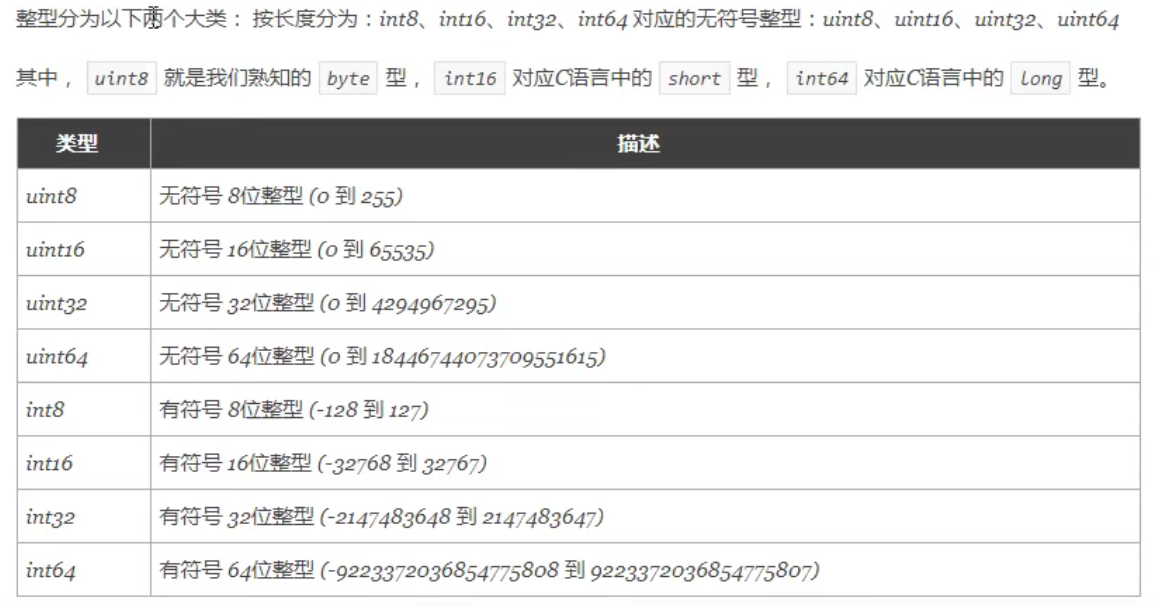
4.1 整型
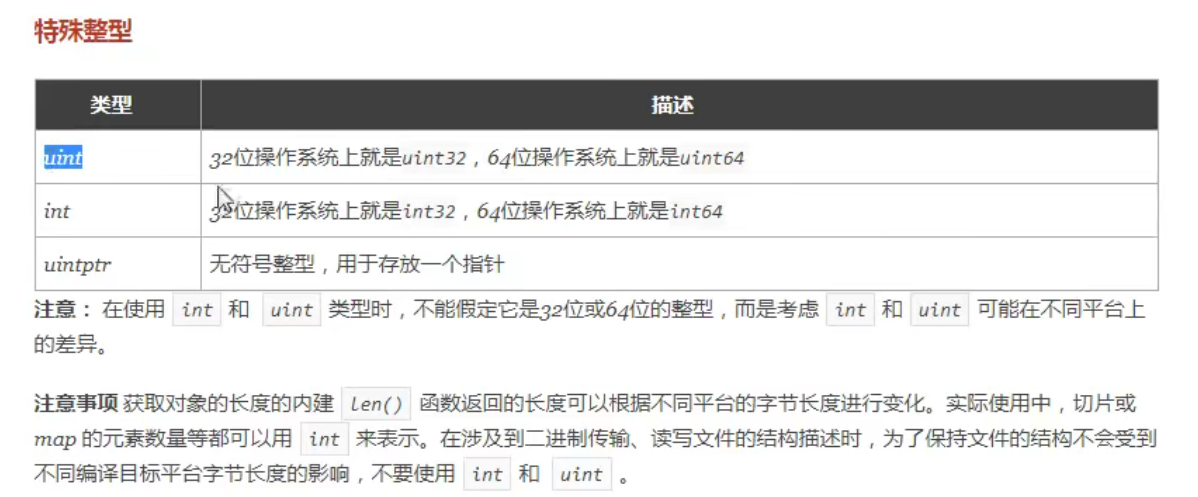
- 查看变量的类型
%T🍨fmt.printf("%T", in1)
4.2 浮点数
go支持两种浮点数:float32 和 float64。 最大值分别为math.MaxFloat32和 math.MaxFloat64。 go语言中默认是float64。
4.3 布尔值
默认false。
4.4 字符串
双引号括起来。单引号括起来的是字符。
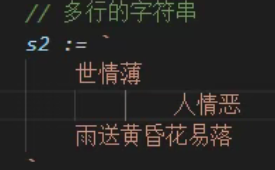
多行字符串可以使用 ` 表示。
 aa
aa
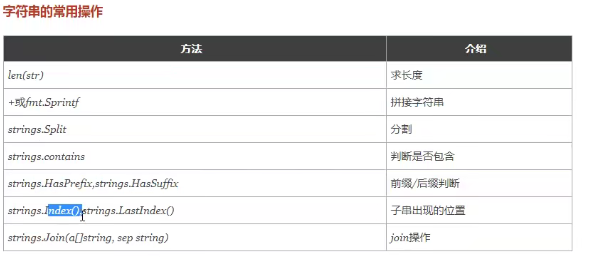
🍨 springf
s1 = Sprintf("%s%s", a,b)a和b拼接,返回值赋给s1变量🍨 Split(“”)
s = strings.Split(" ")返回值赋给s变量🍨 Contians(“理想”) HasPrefix() HasSuffix
判断是否包含字符串
s = strings.Contains(ss, "理想")
4.5 字符
go内置两种字符。byte和rune。rune4个byte,支持unicode编码。
5. 复合数据类型
5.1 指针
*p 和 **p go语言的指针同样支持多级指针。& 取对象的地址。
🍨 例子:
var v1 = 6
p := &v1
🍨 例子:
type User struct {
    name string
    age int16
}
adam := User {
    "adam",
    23,
}
p := &adam
fmt.printf("%d", p.age) // 对属性的访问也是使用 . - go禁止指针运算,因为go支持垃圾回收,指针运算会带来垃圾回收不便。
🍨例子: go允许返回地址
func sum (a, b int) *int {
    sum := a + b
    return &sum
}
go使用”栈逃逸“机制将局部变量分配到堆上。
5.2 数组
[n]elemenType n是数组元素,elementType是数组元素类型。
🍨 例子:初始化
array1 := [3]int{1,2,3}
array2 := [...]int{1,2,3}
array3 := [3]int{1:1, 2:3} // 指定长度,并且由索引值初始化元素。没有初始化元素时使用类型默认值。
array4 := [...]int{1:1, 2:3} // 不指定长度,数组长度由最后一个索引值确定。没有指定索引的元素被初始化为类型的零值
数组是值类型的 ,数组复制或作为函数参数都是值拷贝。
🍨 访问数组:
array := [...]int{1,2,3}
b := array[0]
// 方式1
for i,val := range array {

}
// 方式2
alength := len(array)
for i := 0, i < alength; i++ {

}
5.3 切片
数组的定长和值拷贝限制了使用场景。使用切片slice。其数据结构中有只想数组的指针,是一种引用类型。
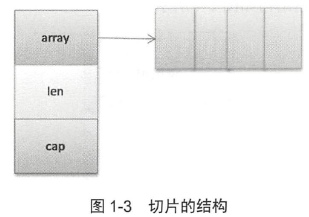
切片的数据结构:
type slice struct {
    array Unsafe.Pointer
    len int
    cap int
}go为切片维护三个元素——指向底层数组的指针、切片的元素数量和底层数组的容量。
声明:
1. 通过数组
array := [...]int{1,2,3}
s1 := array[b:e] // 生成从b到e - 1 的共 e - b个元素的切片。

2. 通过make
// len = 10, cap = 10
a := make([]int, 10)
// len = 10, cap = 15
a := make([]int, 10, 15)- 支持的操作
len() 返回切片的长度。
cap() 返回底层数组的容量。
append() 追加元素
copy() 复制一个切片
5.4 字典
map [K]v K是任何可以比较的类型,v是值类型。
🍨 创建例子:
1. map1 := [string]int{"a":1, "b":2}
fmt.Println(map1[0])
fmt.Println(map1[1])
2. 使用内置make创建

mp1 := make([int]string)
mp2 := make([int]string, 10)
mp1[1] = "tom"
mp2[1] = "jerry"
🍨 支持的操作:
for k,v := range mp1 {

}
delete(mp1, 3)
map并不是并发安全的,并发安全的map可以使用sync中的map。
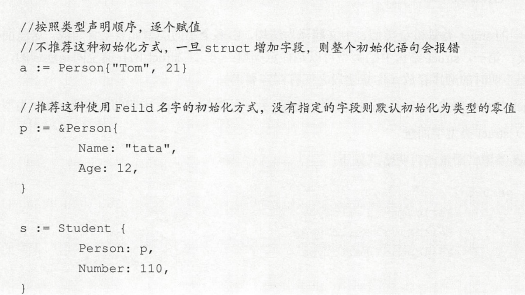
注意,不能直接修改map中某个元素的值。如果要修改map中某个元素的值,必须整体对其进行修改。type User struct {
name string
age int32
}
mp1[1].age = 12 // 错误
adam.age = 12
mp1[1] = adam // 才行struct {
FieldName FieldType
FieldName FieldType
FieldName FieldType
}
type TypeName struct {
FieldName FieldType
FieldName FieldType
FieldName FieldType
}